Where the Gnomes Live
February 21, 2012 § 2 Comments
I’ve definitely had the mushroom inspiration “bug” for a while. Aside from being a huge foodie fan of mushrooms (shiitakes are my fave) in the past few years, toadstool mushrooms have been popping up all around me…

Me on the set of Martha's Halloween 09 'Wild Things' show sitting on a Toadstool stool crafted by Kristin St. Clair
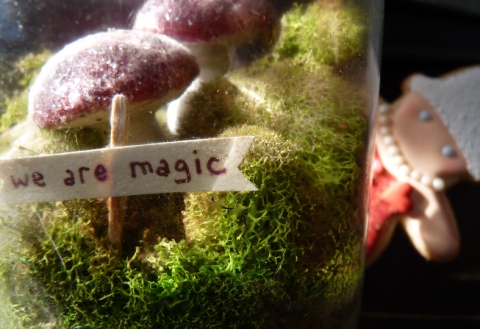
Around the holidays, I was so excited to find these adorable mushroom ornaments with wire spikes in the flower district one day and I just had to buy a box. As a craft hoarder I’m lucky to have a space to keep all my craft materials and these items pretty much magically found eachother just in time to make KF a totally excellent “Terrarium Valentine”.

I used Martha Stewart craft gel glue and both coarse and tinsel glitter to make the mushrooms shimmer
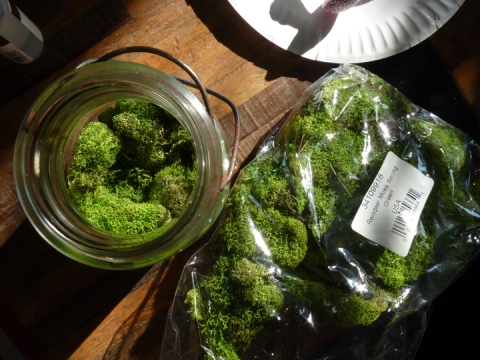
While my crafty ‘shrooms were drying, I cleaned out an antique ball jar (which I collect) and filled it 3/4 full with a combination of potting soil and horticultural charcoal.
I am so happy with the way my toadstool mushroom terrarium Valentine turned out! KF loved it and the reindeer moss does not require any special care. The sign has weathered a bit due to the moisture, but I love the way it looks (plus I can always replace the sign when needed). This would be a really fun project to do with your kiddies or with friends and family at a Craft Brunch not to mention, your Gnomes and Gnomis will love it!
Happy Crafting! Xo Dani
P.S. Look for our March Gnome & Gnomi how to coming soon!
Spreading the Love… A Valentine Cookie Workshop
February 17, 2012 § 2 Comments
Several years ago I had a very (very) small studio space in the Monroe Center of the Arts, located on Monroe Street in Hoboken, NJ. The Monroe Center is a city block sized warehouse style building that for years has been home to art related businesses. When the cookie portion of my business took off, I had to find a studio with a kitchen and the Monroe Center was not an option. I was sad to leave because I especially loved the community feeling of working amongst other artists at the Monroe Center.
It’s funny how life circles you back sometimes… Early this year I was so happy to be introduced to two local artists, Patti Morale and Justine Uva, who own a beautiful studio space in the Monroe Center called “Urban Arts“. Patti and Justine were looking for ways to expand their students’ horizons in art and thought my cookie workshops might be a good fit. When Justine said “We do what we love and we love what we do” I knew I had found the perfect place!
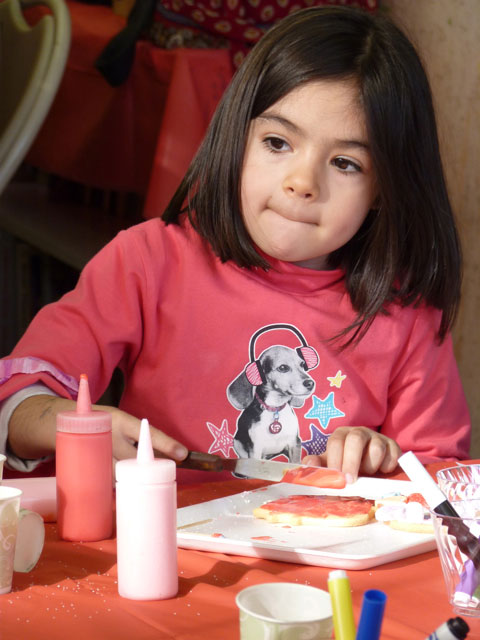
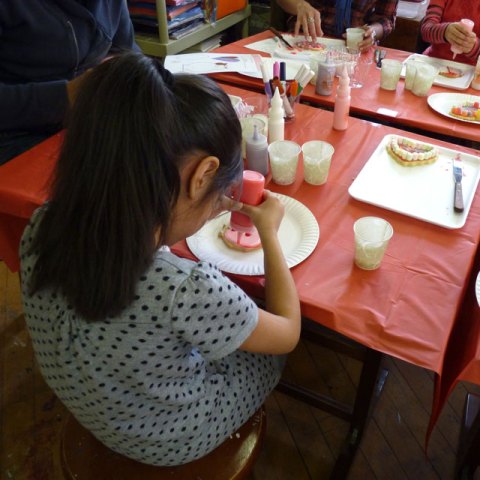
Our first workshop “Sweets for My Sweet” was held this past Sunday, in two sessions. Classes filled up quickly and it was a wonderful balance of Urban Arts students mixed in with some amazing Sweet Dani B “friends ‘n’ fans” (thank you!)- a few, who I was so touched and flattered to find out, drove from Boston and Rhode Island to attend (Wow! Thank you!). This eclectic mix of excited cookie icers ran the gamut from “Mommies and Me” (girls and boys, and all ages of Moms and their kids), to groups of girlfriends, to 11 year old B.F.F’s, to a sweetheart Valentine date, to a family day out… I truly loved seeing everyone come together to share a few hours with us doing what we love…
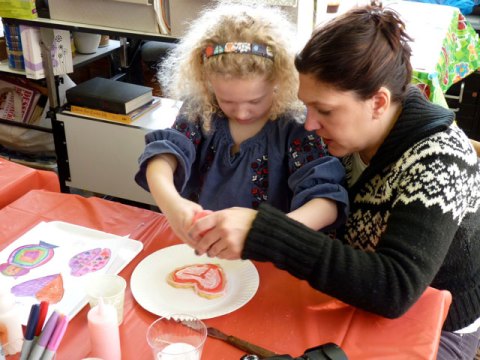
(More adorable style!) Isabella and her Mom had a great time bringing Isabella's amazing cookie sketches to life

Speaking of sweet, these "sweethearts" came to our workshop as their Valentine date- now that's my kind of outing!
Nine batches of icing and sixty cookies later, we called it a day on “Sweets for my Sweet”. It was a wonderful day “doing what I love and loving what I do” and sharing that with all the Expert Icers who attended. Thanks to Justine & Patti for welcoming me back to the Monroe Center… I can hardly wait for our next cookie workshop (March 31st and April 1st)! Hope you can join us- details coming soon!
Xoxo Dani
For more photos from our cookie workshop, check out Dani’s Flickr page! Email us with your photos from the event at info@sweetdanib.net to add to this album! SWEET!
A Cookie Nativity: Behind the Scenes on the Martha Show
December 20, 2011 § 5 Comments

Dani Fiori & Martha Stewart are seen in this photo from"The Martha Stewart Show" in NYC on Thursday December 15, 2011. Photo: Rob Tannenbaum/The Martha Stewart Show
If someone would have told me back when I was getting C’s in my life drawing classes at RISD that someday I’d be “a frequent guest” on The Martha Show using my illustration skills, I would have never believed them. Especially if they mentioned I’d be illustrating in royal icing (I guess pencil and charcoal really wasn’t my thing)! Here’s a behind the scenes look at my latest visit to Martha’s set in Chelsea Studios, NYC…
Designing and icing the cookie Nativity scene for Martha was very illustration heavy- after all, many of the cookies are people. I did a very rough sketch in the beginning and also showed photos of the amazing nativity cookie cutters… lucky for me the producers at Martha, who I have worked with for a few years now, “get” my drawings and the project was approved from there.
Since the show is taped live, you are asked to be on set EARLY. Esp if you want hair and makeup (yes, please!). I LOVE how Deb Jones does my makeup every time!
My bestie, Tamara, has been helping me bake all season (thank you Tam!) so she met me there to help and cheer me on. (She also totally lucked out by scoring an audience seat!)
The time goes by really fast. Just as Tam and I finished setting up the Nativity with Kait Taylor, (our friend and assigned Martha Show set stylist) I was whisked in to get my hair done. Not so long after I was called to set for rehearsal where we do a full read thru of the segment.
Next, into the prep kitchen to record my bump shot… I always love to see what they are cooking!
After another quick makeup touch up, I headed back to the greenroom to watch segment 1. This is when I’d normally start to get nervous but this time I was fairly calm. Kyle, the stage manager came to get me and we gathered in the set alley as segment 1 came to a close. The doors open as soon as they cut to commercial and I’m up!

Backstage, Jennifer, Kait, Mary, Kyle and Joanne wish me luck! They are the amazing Martha team that made my segment happen! (You guys are the best! Xo)
The segment went very well- I always have fun decorating cookies with Martha. She loves cookie decorating and really enjoyed decorating the faux bois manger walls as well as the Nativity animals inspired by some of her own furry and wooly farm friends!
At the end of a segment I congratulated Martha on becoming a Grandma and presented her with a cookie box for the adorable Baby Jude. I also gifted her one of my partridge in a pear trees cookies.
After the segment, I went back to pack up our greenroom, change my shoes, and waited till the show was over.

Tam in the audience with one of the amazing giveaways from the show that day! (She got me one too- Yes!)
Thank you to Martha Stewart for having me on for another fabulous Holiday Cookie Week! Thanks to the team I worked with- especially Producer, Mary Forrest!
I hope you enjoyed the JUICE from behind the scenes! It was a really fun day. Life is Sweet! Xo Dani
A Pom Punch Cheers to the Urban Girl Squad!
December 16, 2011 § Leave a comment
Our cookies aren’t only for kids… I’m happy to say adults LOVE them too! For a long while I had been hoping to host a “ladies night” style cookie workshop and Amanda Hoffman from the Urban Girl Squad was just the person to plan this event with!
Urban Girl Squad is a social networking group for women in their 20s and 30s and, wow, do these ladies live it up! From lessons in burlesque, baking the perfect cupcake, horseback riding and wine tasting- their members try it all and get to enjoy all these experiences with their friends while making new friends. Sweet!
I was really excited to host this Holiday Cookies ‘n’ Cocktails workshop. Using the Sweet Dani B Expert icing kit, we decorated three holiday cookies: the Gingerman, the Christmas tree, and the Holiday version of our favorite owl cookie.
In between cookie decorating, I showed the ladies how to make one of my fave holiday cocktails to serve at a party: Pom Punch. My twist on tradition is serving this drink in a pint sized ball jar. That way you can pre mix the individual servings, chill them and easily hand them out to guests as they arrive.
Once your Pom Punch cocktail jars are prepped (recipe follows), set up a garnish bar for each person to “dress up” their drink. This demo was a big hit with the ladies since it’s a great way to present a fun signature drink at your party- plus, it will save you time right when you need it- at the start of your party.
Sweet Dani B’s Pom Punch:
• 1 cup good quality Vodka (Sky, kettle one, Absolut)
• 1 3/4 to 2 cup(s) Pom juice
• 1/2 cup fresh squeezed orange juice*
• 1/4 cup orange liquor
Combine all ingredients in a large shaker, and shake. Pour into individual ball jars and chill.
Garnish Bar Set up :
• Ice
• Rosemary “sticks”
• Mint “sticks”
• Pomegranate seeds
• Proscecco (a splash of prosecco or Champange is a nice top off to this drink)
• Orange wedges
• Coarse Sanding Sugar on plate (guests can sugar their own ball jars- be sure to have a glass next to the plate so they can transfer their drink back and forth)
• Drink straws
* Sweet Dani B Tip: Fresh juice in cocktails makes a huge difference… Of coarse you can use store bought orange juice from a container BUT fresh squeezed juice will bring your cocktails to the next level of deliciousness. Try it- I promise you will love it!
Thanks to Amanda and Leslie for setting up this event! Thanks to photographer Beja B (gorgeous photos!) and Mike Boylan Creative Video for shooting video of all the fun we had (videos will be up on SweetDaniB TV on you tube shortly)!
I hope you enjoy the punch! Merry Merry! Xo Dani
How to Ice the SDB Partridge in a Pear Tree
December 13, 2011 § 1 Comment
The Holidays are upon us and I’m excited to show you how to ice one of my favorite cookies of the season… the Partridge in a Pear Tree. I designed this cutter with my friends at CopperGifts.com and love the way it turned out. It’s both an elegant and fun design. There is plenty of surface to ice on and a wide tree trunk- perfect for trying your hand at drawing faux bois! So bake up your Partridge in a Pear Tree cookies in your favorite flavor dough and let’s get icing! (If you haven’t ordered this adorable cutter yet, get it here).
Using brown icing, mixed a bit thicker, use your thin tip Sweet Dani B icing bottle to draw an oval tree knot off center of the trunk. Then draw an oval and lines surrounding it. Let some lines attach, keep others separate. The design is very organic, so you can get creative with your lines as you do these.
Using copper tinted royal icing in your thin tip bottle, ice the partridge feather at the top of the bird’s head. Add gold disco dust and lightly brush off excess. Use copper icing to fill in the bird shape. Add the brown jimmy eye, and draggees or candy beads to create the wing shape (this can also be drawn in with a contrast color). Finish with pixie disco duct (which lets the copper bird color shine thru). Let dry for an hour or so.
This is a great cookie to package in a clear top box and give as a stocking stuffer, with a gift card envelope or with a bottle of wine at your next Holiday Party. I’m packing one up to gift to Martha as a Thank You for having me on the show this week for cookie week! (Tune in or set your tivos this Thursday 12/15/2011 to the Martha Stewart Show on the Hallmark Channel- it’s going to be SWEET!)
Xoxo Dani
Leaf Peeping (and Eating)!
November 22, 2011 § Leave a comment
Who says you have to go to the country to peep the Fall leaves? While walking Spot and Hope each morning, I have been enjoying city side leaf peeping right here in Weehawken, NJ! It has been beautiful and inspiring!
And the result of a little inspiration…
Check back tomorrow for a cookie tag/ place card download… just in time for your Thanksgiving table!
Xoxo Dani
How to Ice the Peace & Love Dove
November 18, 2011 § Leave a comment
I’m so thrilled and honored to have a Sweet Dani B cookie kicking off Real Simple’s Holiday gift guide. As mentioned in my previous post, this little dove means a lot to me so I thought I’d spread the love and share my icing how to…
Make your favorite cookie dough and cut the dove shapes using the amazing dove cookie cutter from CopperGifts.com. If making to use as gift tags or Holiday ornaments, don’t forget to poke a hole (using a drink straw) at the dove’s top wing for hanging.
Mix royal icing in white (I use white Americolor gel coloring – also available at Coppergifts.com- to make white icing- once you add white, you will notice the difference).
Using one of your Sweet Dani B Expert Icing kit thick bottles, outline and fill the dove cookie shape. Using your spatula, gently spread and even out icing. Give the cookie a shake to help the icing settle.
Add a candy eye and a candy heart. Note: I used a silver dragée for the dove eye because I love the elegance it brings to the overall look. Silver dragées are for decoration only. Please pull any draggees off the cookie before eating. If making these for kids to eat, I suggest using a candy bead eye.
Sprinkle immediately with coarse sanding sugar.
Let dry for 8 hours or overnight before hanging or packaging.
This cookie is sure to steal the show hanging on your tree or adorning your Holiday presents! If you can’t wait until Christmas, this dove would be a lovely “Give Thanks” cookie- adding a beautiful pop of white to your Thanksgiving festivities. Share these cookies with friends and family and enjoy the feeling of letting peace & love soar! Xoxo Dani
M&M Acorn Cookies! Mmmmmmm!
November 1, 2011 § 1 Comment
While I’m planning a little Día de los Muertos dinner for two (more about that later), I thought I’d re post this fun and sweet acorn cookie how to. Hopefully you took my advice and saved some of those M&M’s from last night!
Bake your acorn cookies using sugar cookie dough or chocolate or gingerbread- everything works with m&ms!
Mix royal icing in complimentary Autumn acorn colors… orange, yellow green, light brown, golden yellow… and fill your Sweet Dani B thick icing bottle(s).

This step is optional but for extra yumminess add sanding sugar... let dry for 30 minutes or longer then carefully clean off excess sanding sugar...

Using an icing color that best matches your m&ms, fill in acorn cap and line up m&ms in rows allowing the m&ms to overlap a bit...

if you are using the coppergifts acorn, you should be able to fit 3 rows of m&ms but adjust accordingly for your cutter
Happy November and, as always, Happy Icing! Xo Dani
Behind the Scenes with Mr. Bones
October 25, 2011 § 4 Comments
I was so pleased with the quality and look of our Sweet Dani B TV cookie icing videos for Easter, so I, once again, enlisted the talented Mike Boylan to shoot our Mr. Bones how to icing videos.
Mike LOVES Halloween and my love for Halloween has been growing over the years since being inspired by working on Martha Stewart’s amazing Halloween shows… as a result, we had some very fun props to dress the “set” with.
Its a weird feeling talking into a camera and it makes a lot of people (me included), nervous. Clicking the scene clapboard though, cracked me up every time which was a good distraction.
It happened to be a humid day which is never great for cookies- especially chocolate cookies. In addition I rolled these a little thin and under-baked them. Bad mistake! I had a few cookies break on during transport so I was sure to handle them carefully while icing. Meanwhile, while we were setting up the next shot…
Last but not least, the Dapper Zombie. I smile a lot when I look at our cookies (part of the reason Life is Sweet!) but this guy totally cracks me up for some reason and really makes me smile!

Mike zooms in for a beauty shot of the Dapper Zombie- I love the spooky sketches his boys drew on their glass doors in the background!
And that was a wrap on the how to videos! I wanted to show a fabulous tip for displaying these cookies on cupcakes- (delicious cupcakes in fact, by my cupcake friend Carrie). The humidity was just too much for them and we suffered several more cookie casualties! No worries though, we put them to good use and Mike and his family enjoyed a delicious and spooktacular snack that night!
I hope you are having this much fun with your Mr. Bones Cookie Cutter! Have a very Happy Halloween!
xoxo Dani
Autumnal Owl Cookie Decorating How-To
September 30, 2011 § 1 Comment
“Autumnal” is such a great word- so proper and wise sounding- how appropriate! Owls are certainly autumnal and the idea behind many of the cookie cutters I’m designing with Coppergifts.com is that they are multi purpose…
Click here to download the icing decorating template to the autumnal version of the Lovebird Owl. I look forward to sharing a Holiday version of this owl with you as well because WHOOOO wouldn’t want to bake and decorate owl cookies all year ’round!?
Happy icing! Xoxo Dani
P.S. …and don’t forget about your SDB Expert Icing Kit!

